
Back
Migrating a Virtual Machine
There are two ways to migrate a virtual machine: live migration and offline migration.
Live Migration (XenMotion)
Live migration is a function that allows a running virtual machine to be migrated to another host or storage without stopping it. Because migration is possible without stopping the virtual machine, it is possible to reduce system downtime associated with the migration of server operations.
0. Advance preparation
Before migration, perform the following steps to ensure stable operation.
- Exclude from backup .
- Delete all snapshots .
*By deleting a snapshot, the points of the incremental backup will be lost, and from the next time onwards, a full backup will be performed instead of a differential backup. The backup itself will not be deleted.
1. Click “Migrate”
From the list of virtual machines, open the source virtual machine and click “Migrate”.
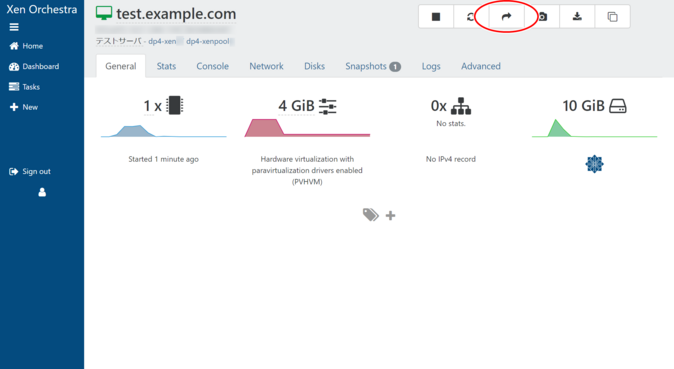
2. Select the destination host and storage
A modal window titled “Migrate VM” will appear.
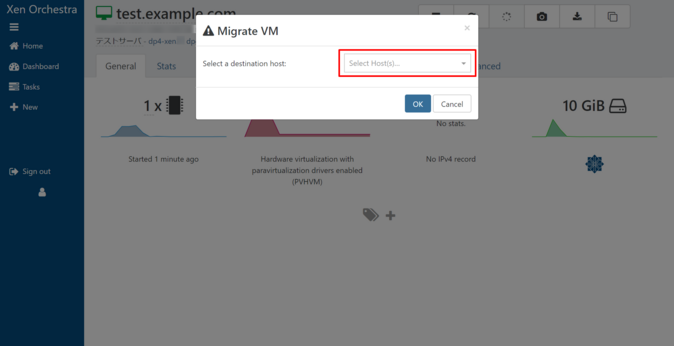
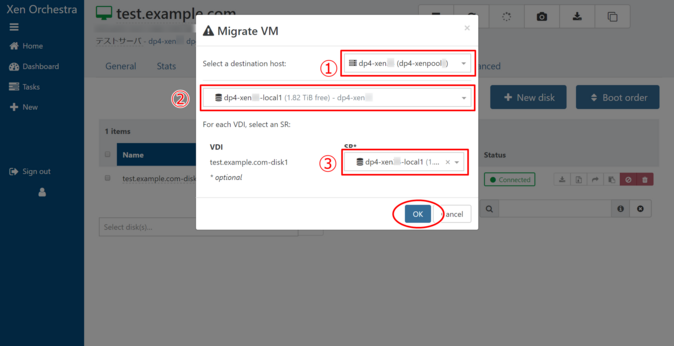
Enter the following destination information and click “OK”.
- Select a host
- Select your primary storage
- Select storage for each virtual disk
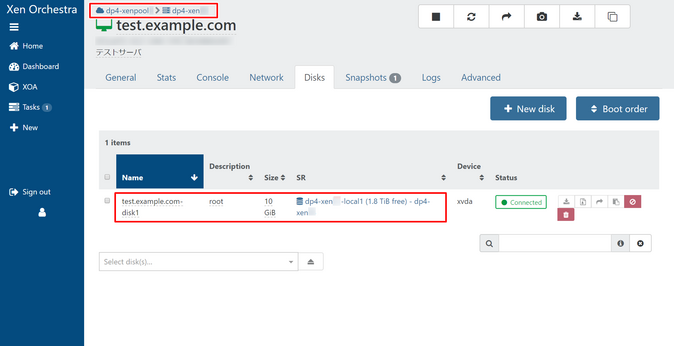
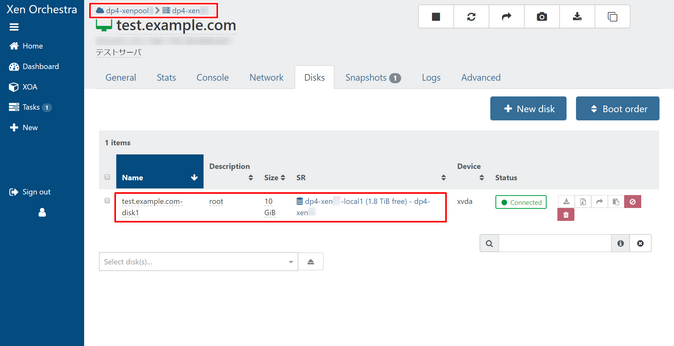
Once the task is complete, you can confirm that the storage has been migrated from the host displayed in the upper left corner of the screen and from the virtual disk in the Disks tab.
Live migration failure
Please note that live migration of a heavily loaded virtual machine is prone to failure and in some circumstances may result in the virtual machine hanging, which may require a restart of the Xen ToolStack or, in the worst case, a reboot of the Host .
Compared to live migration, the offline migration described below is guaranteed to be successful. Although offline migration requires downtime, the migration time can be roughly estimated based on the size of the virtual disk.
Offline Migration
Offline migration is the ability to shut down a virtual machine and then migrate it to a different host or storage.
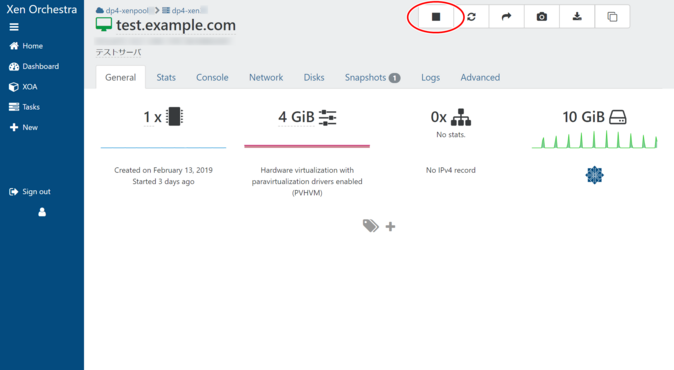
1. Stop the source virtual machine
From the list of virtual machines, open the source virtual machine and stop it.
Please see here for instructions on how to stop a virtual machine.
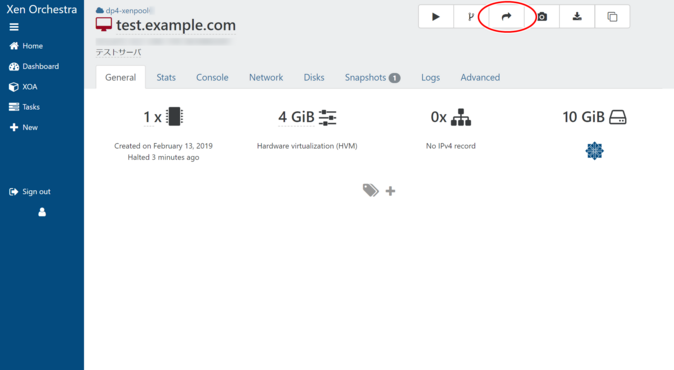
2. Click “Migrate”
Click Migrate.
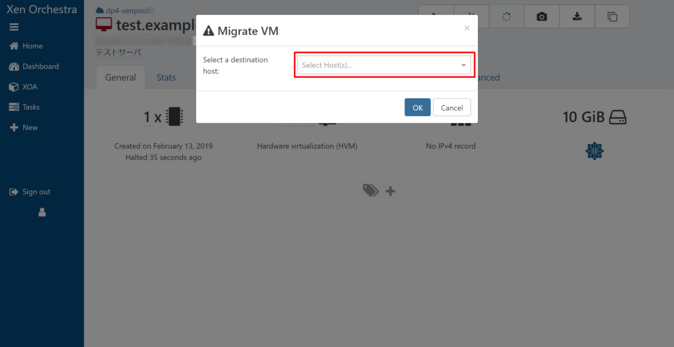
3. Select the destination host and storage
A modal window titled “Migrate VM” will appear.
Enter the following destination information and click “OK”.
- Select a host
- Select your primary storage
- Select storage for each virtual disk
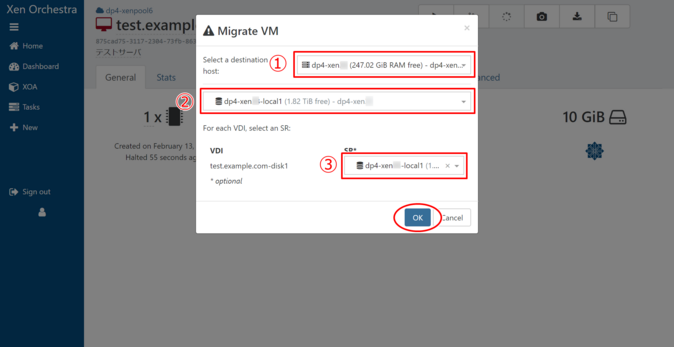
Once the task is complete, you can confirm that the storage has been migrated from the host displayed in the upper left corner of the screen and from the virtual disk in the Disks tab.
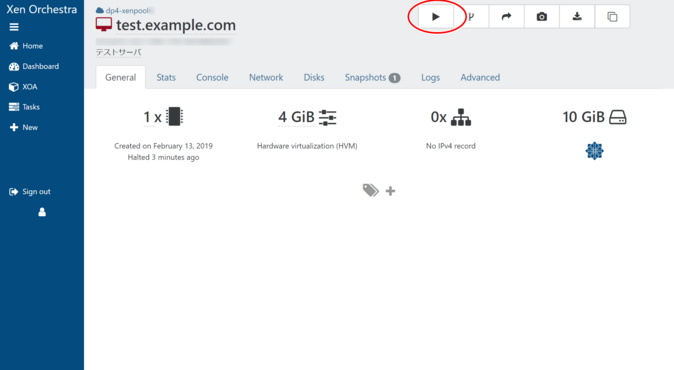
4. Start the migrated virtual machine
Please see here for how to start a virtual machine.
About the Status of a Virtual Machine After Migration
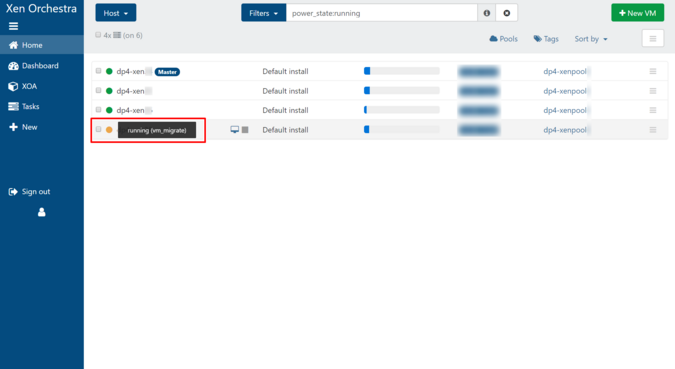
After the migration is complete, when you check the corresponding virtual machine in the list of virtual machines, the status icon may remain as “running (vm_migrate) (yellow)” and not return to normal. In this case, please restart the toolstack .

 Japan
Japan Korea
Korea China
China Taiwan
 Vietnam
 Thailand
 Indonesia
 Portugal
 Spain
Spain France
 Germany
 Egypt
Egypt Russia
