
Back
How to Restore Backup Data
This system creates backups once per hour. In the event of a server failure, it is possible to restore the virtual machine from the backup.
Restore a Virtual Machine
1. Open the backup you want to use
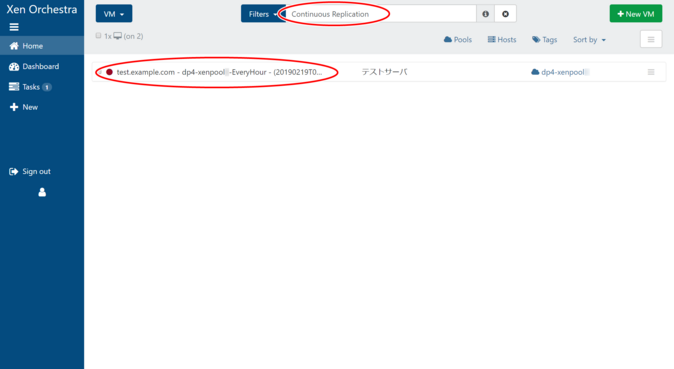
Backups are created with the name “(Backup source virtual machine name) – (Pool name) – EveryHour – (Backup creation date and time (GMT)”.
You can narrow down the backups by removing “power_state:running” from “Filters” and entering “Continuous Replication”, then click the target backup from the list of virtual machines.
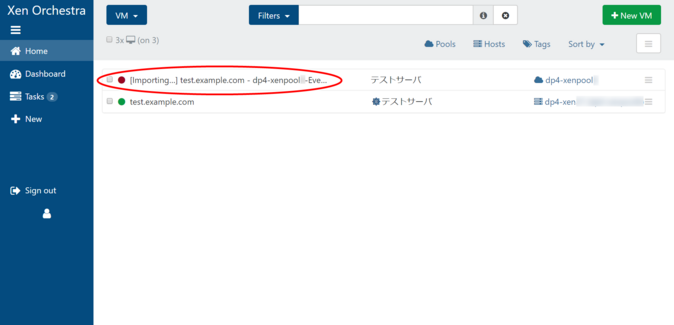
As shown in the image below, when a backup is being updated (those with “[importing…]” at the beginning of the name), unexpected behavior may occur, so please refrain from performing any work until the synchronization is complete.
Step 2: Create a clone
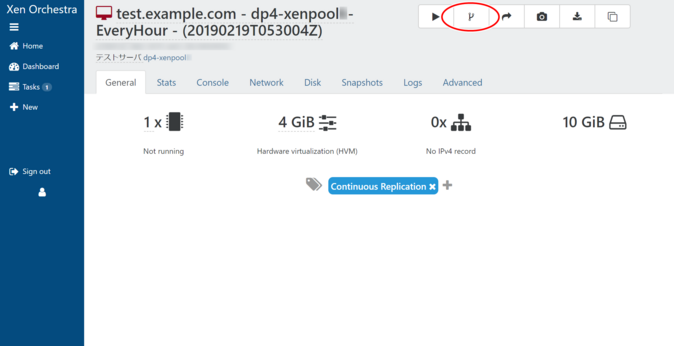
To restore to a different SSID than the original virtual machine, create a clone of the backup.
Click “Fast clone”.
3. Open the created clone
The created clone can be viewed in the list of virtual machines.
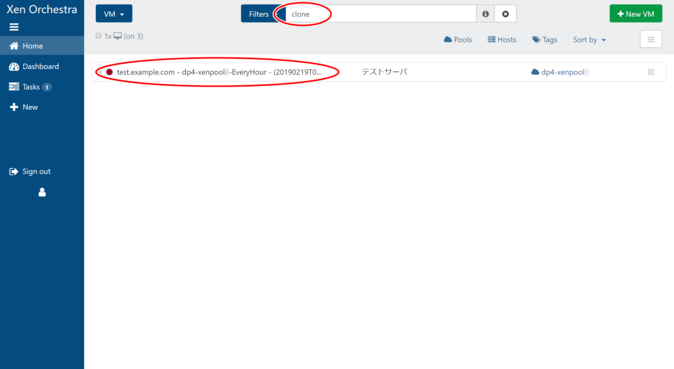
Clones are created with “_clone” at the end of their names. If you remove “power_state:running” from “Filters” and enter “clone”, you can narrow down the list to those with “clone” in the name, then click on the target clone from the list of virtual machines.
Step 4: Rename your virtual machine
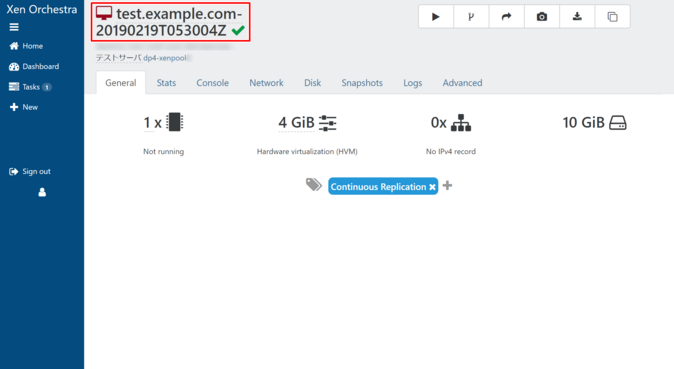
Click on the virtual machine name in the upper left of the created clone and change it to any name you like. We recommend a name that includes the date and time of backup creation, as shown in the image on the left.
5. Migrate your disk storage
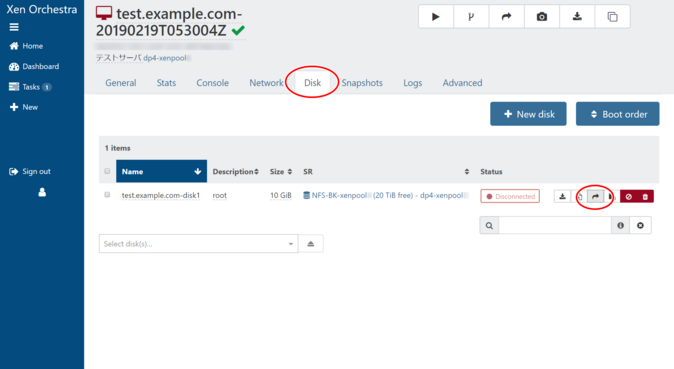
Migrate the disk storage from the backup server to the local server.
Open the “Disk” tab on the details screen and click “Migrate VDI”.
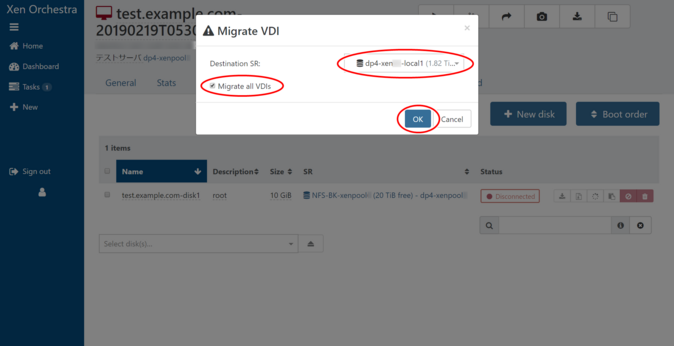
A modal window titled “Migrate VDI” will appear, so enter the following and click “OK”.
- Destination SR: Select the destination storage.
- Migrate all VDIs: This will migrate all associated virtual disks, so be sure to check this box.
6. Untag the virtual machine
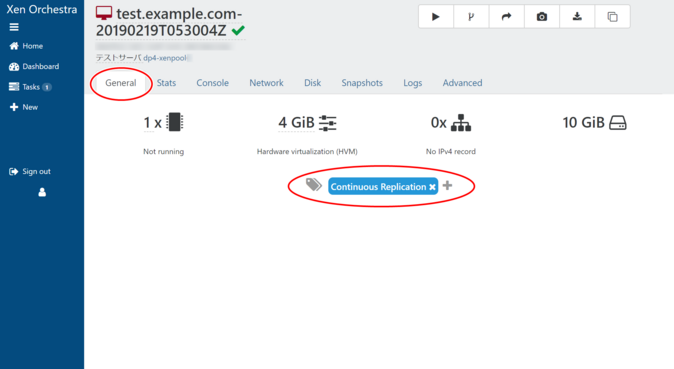
Open the “General” tab on the details screen.
“Continuous Replication” is a tag attached to the backed up virtual machine. Click the “x” on the tag to remove it. If you do not remove this tag, it will not be backed up after restoration, so be sure to remove it.
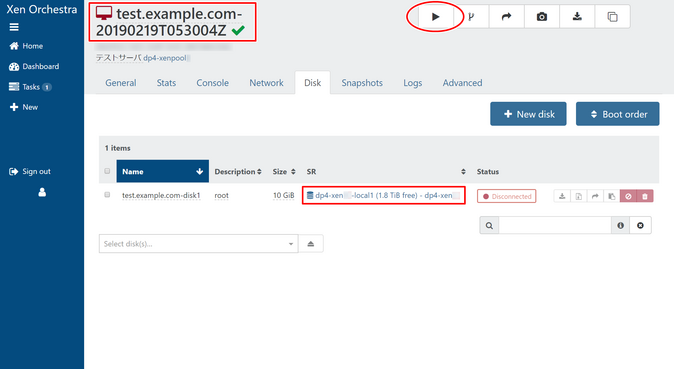
7. Start the virtual machine
Once the above is complete, start the virtual machine.
Before starting the machine, execute PING to the IP address you want to use to make sure that the IP address is not the same as that of another machine.
Please see here for how to start a virtual machine.

 Japan
Japan Korea
Korea China
China Taiwan
 Vietnam
 Thailand
 Indonesia
 Portugal
 Spain
Spain France
 Germany
 Egypt
Egypt Russia
