
Back
How to Create a New Virtual Machine
This page provides instructions on how to create a new virtual machine (VM) using Proxmox VE on the HRPC KVM version.
Users can utilize uploaded ISO files and configure settings such as CPU, storage, and network to create a virtual machine suited to their environment and use case. As an example, we will demonstrate the setup of a Linux operating system.
Creating a New Virtual Machine
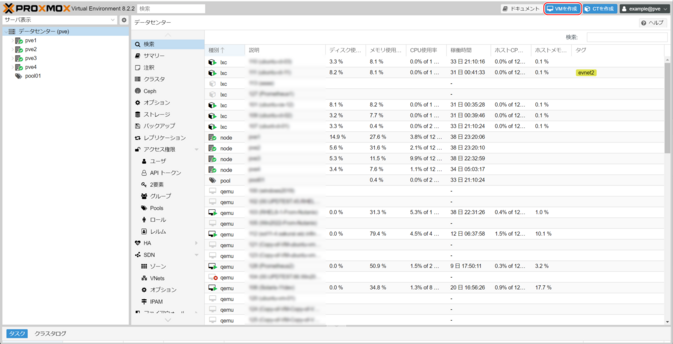
1. Click the “Create New” Button
On the HOME screen, click “Create VM.”
2. General Settings
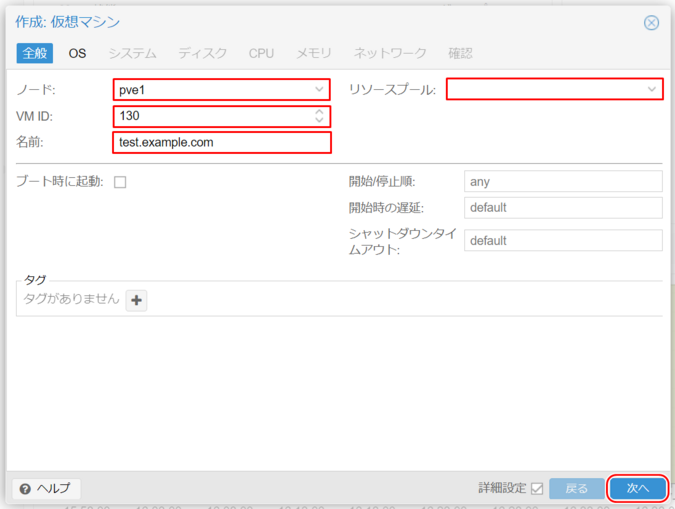
Node
Select the node (physical server) where the virtual machine will be created.
VM ID
A unique number is automatically assigned to identify the VM within Proxmox VE. The initial value starts at 100 and increments sequentially.
Name
Enter a name for the virtual machine. A hostname is recommended here.
Resource Pool
Select a resource pool (logical group of VMs) where the virtual machine will be created (optional).
Click “Next.”
3. OS Settings
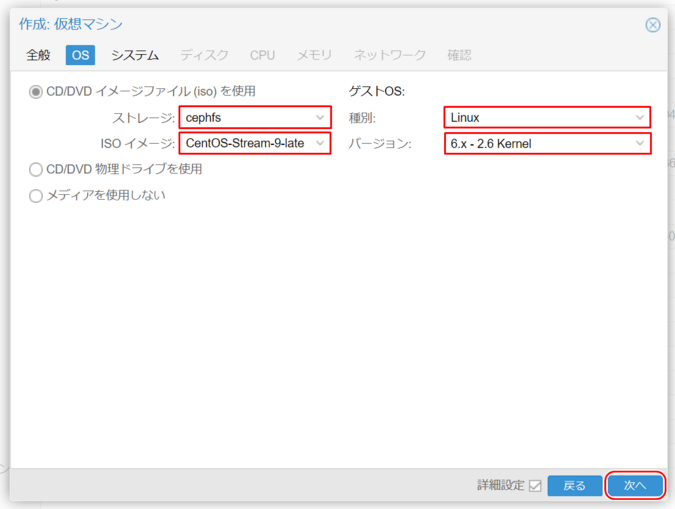
“Use CD/DVD Image File (iso)”
Select the file system where the ISO file was uploaded from “Storage.”
- In an HCI-designed server, “cephfs” is used.
- In a 3-Tier model, the configured BSF or ESF NFS name is used.
ISO Image
Select the appropriate ISO image for the guest OS installation.
Guest OS
Choose the type and version of the guest OS to be installed.
Click “Next.”
The selected ISO image must be uploaded by the user. For more details, refer to:
Support Information / Manual / HRPC – Proxmox VE / Others / How to Upload ISO Images.
4. System Settings
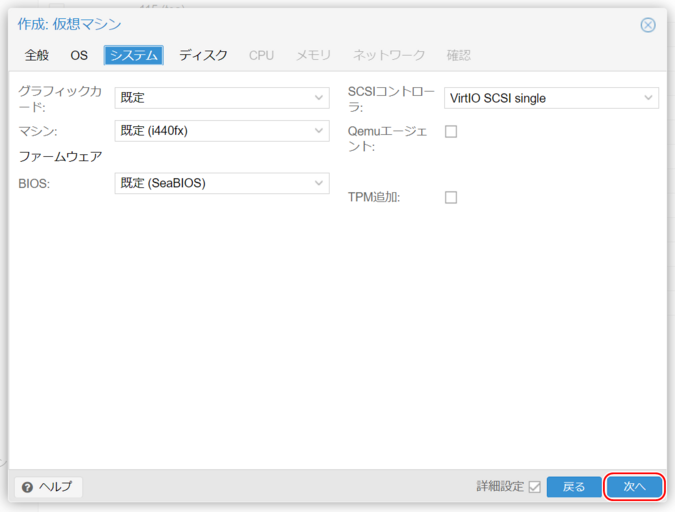
Graphics Card
Default.
Machine
Default (i440fx) – No need to change.
Firmware (BIOS)
Default (SeaBIOS) or OVMF.
SCSI Controller
Default: “VirtIO SCSI Single.”
Reference: About SCSI Controllers.
Qemu Agent
Check this box if planning to install Qemu-guest-agent.
Add TPM
Required for Windows 11 and Windows Server 2022 or later.
Click “Next.”
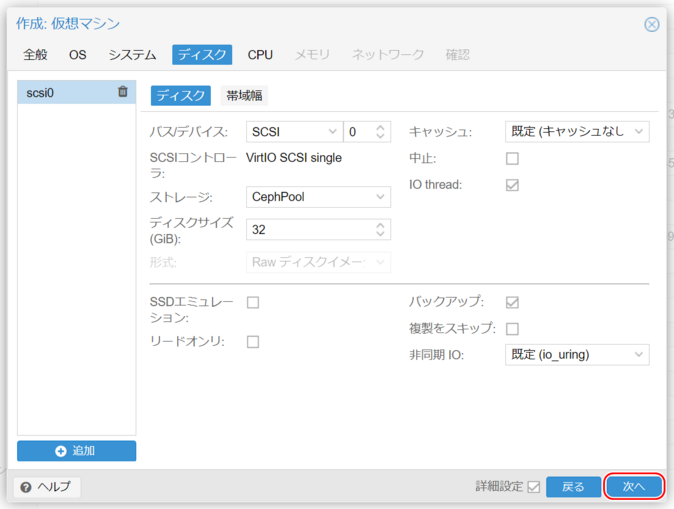
5. Disk Settings
Configure virtual disk settings, including the disk controller (bus/device) and connected virtual disks.
Bus/Device
- IDE: Supports up to 4 virtual disks; compatible with nearly all OSs.
- SATA: Supports up to 6 virtual disks; highest compatibility with physical hardware.
- SCSI: Connects to the SCSI controller selected in system settings.
- If set to VirtIO SCSI or VirtIO SCSI Single, it allows the fastest disk access.
- However, the OS must have the VirtIO driver; otherwise, install the OS using another method, then switch after installing the VirtIO driver.
SCSI Controller
Displays the SCSI controller selected in the previous step (VirtIO SCSI Single or VirtIO SCSI).
Storage
- HCI model: CephPool
- IaR model: ics0
- 3-Tier model: esf0
Disk Size (GiB)
Specify the required disk size.
- HCI: Simply select CephPool.
- ESF: Choose a format:
- Raw: Faster access.
- QEMU format (qcow2): Allows snapshot creation (with limitations).
Cache
- directsync: Prioritizes data integrity.
- Write Back: Prioritizes performance.
- write through: Caches read-only.
Discard (Trim)
Allows the storage to reclaim deleted and unused space. Some guest OSs require SSD emulation.
IO Thread
Enabling IO threads allows disk write operations to be handled by a separate thread from the main OS thread.
Click “Next.”
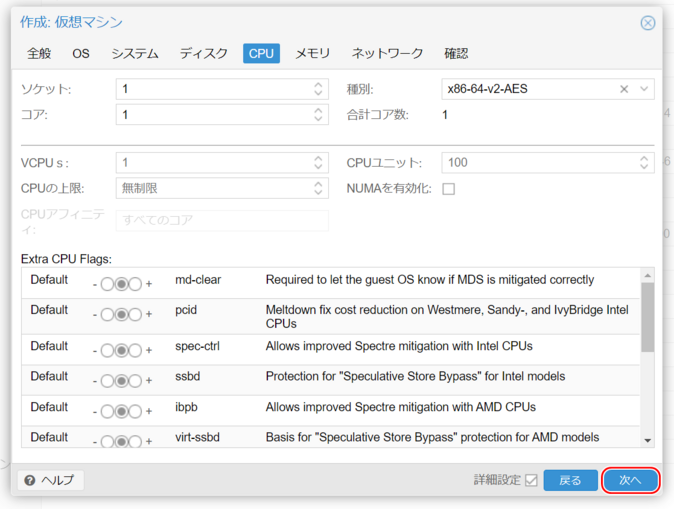
6. CPU Settings
Sockets
Determines how the guest OS perceives multiple sockets. Default is 1, but more may be needed depending on software license requirements.
Cores
Specify the number of cores for the VM.
- Total cores = Sockets × Cores per socket.
- Core count affects performance, not the socket/core distribution.
Type
Specifies the CPU type presented to the virtual OS.
- For most OSs, leave as “x86-64-v2-AES.”
Click “Next.”
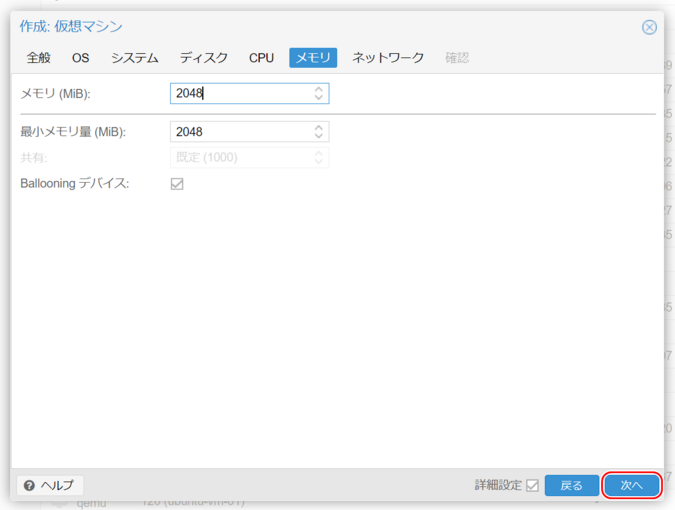
7. Memory Settings
Memory (MiB), Minimum Memory (MiB)
Set the required memory amount. Typically, both values are the same.
Ballooning Device
Uncheck this option.
Click “Next.”
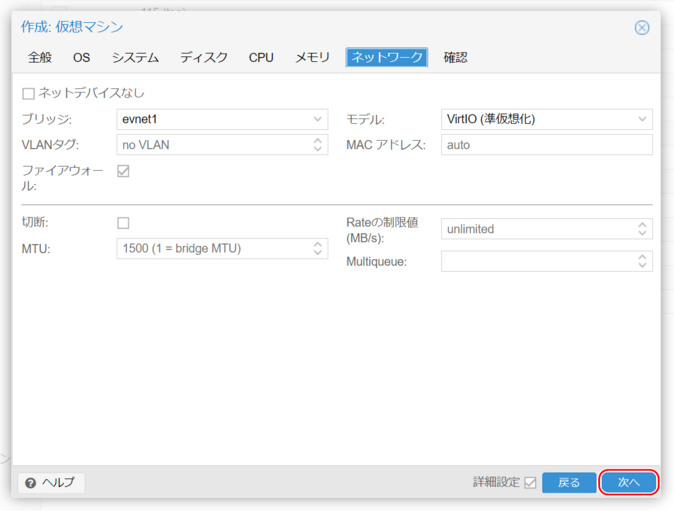
8. Network Settings
Bridge
The bridge is preconfigured with the VNS name.
- Example: If the VNS name is YCN-LAN0, set it to YCN_LAN0.
VLAN Tag
Leave as “no VLAN.”
Model
Typically set to VirtIO.
Click “Next.”
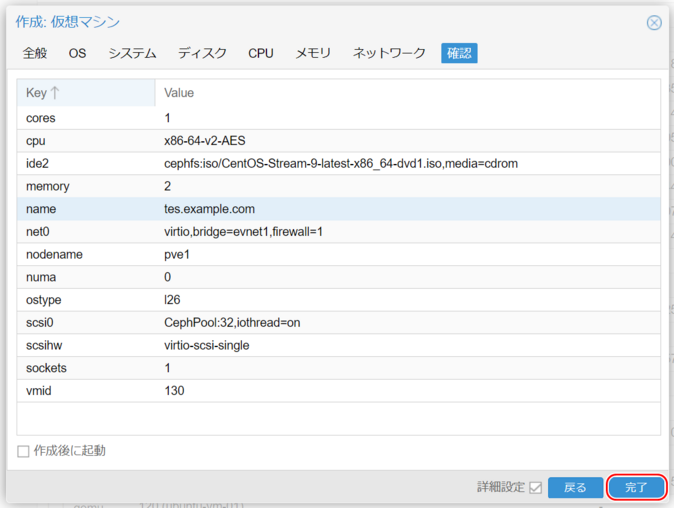
9. Review Settings
Review the input settings and click “Finish.”
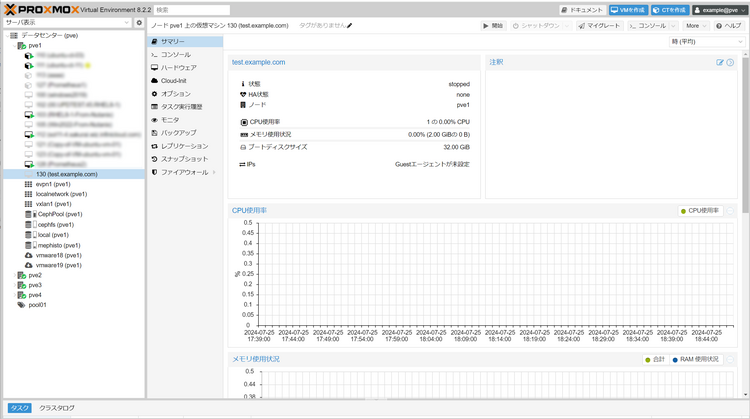
10. VM Creation Complete
The virtual machine is created under the node specified in step 2: General Settings.
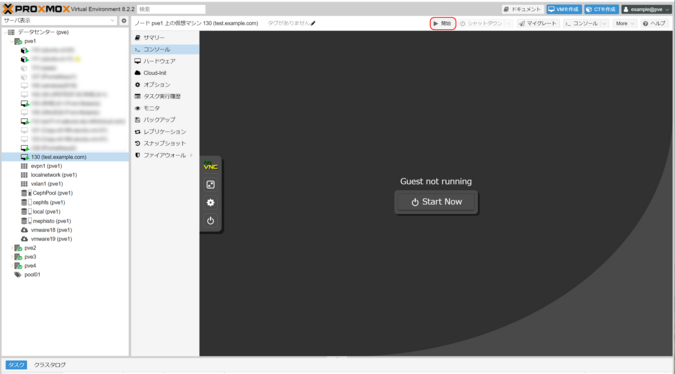
11. Start the Virtual Machine
Next, install the guest OS.
- Navigate to the “Console” tab and click the “Start Now” button to start the VM.
Before starting the virtual machine, refer to: Important Notes for Guest OS Installation.
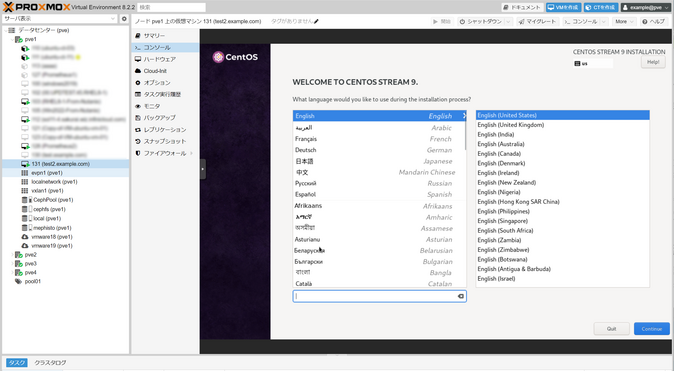
Once the virtual machine is running, follow the on-screen instructions to install the guest OS.
12. Install the Guest OS
Follow the on-screen instructions to complete the guest OS installation.

 Japan
Japan Korea
Korea China
China Taiwan
 Vietnam
 Thailand
 Indonesia
 Portugal
 Spain
Spain France
 Germany
 Egypt
Egypt Russia
