
Back
How to Install a Client Certificate
This page explains how to install a client certificate issued by our company onto your computer.
| Note: The screen may vary depending on your operating system and its version. |
For Windows
| The following steps apply to both Windows 10 and Windows 11. |

1. Open Control Panel and click “Network and Internet” → “Internet Options”

2. Click the Content tab, then click the “Certificates” button
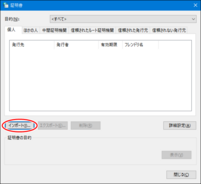
3. Click the “Import” button
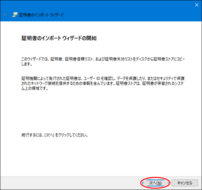
4. Click the “Next” button
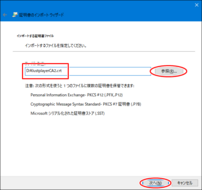
5. Click the “Browse” button, select the “JustplayerCA2.crt” file we sent you, then click the “Next” button
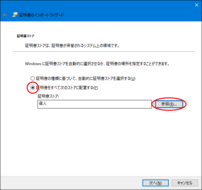
6. Select “Place all certificates in the following store.” If the certificate store is not “Trusted Publishers,” click the “Browse” button. If the certificate store is “Trusted Publishers,” click the “Next” button and proceed to step 9.
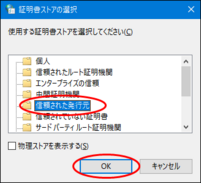
7. Select “Trusted Publishers” and click the “OK” button
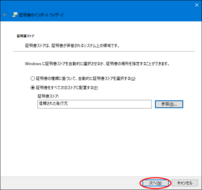
8. Click the “Next” button
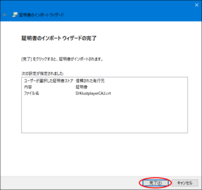
9. Click the “Finish” button
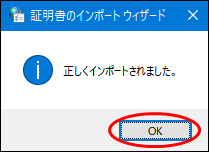
10. Click the “OK” button
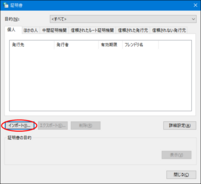
11. Click the “Import” button again
Next, install the client certificate.
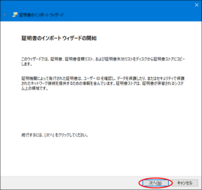
12. Click the “Next” button
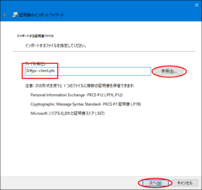
13. Click the “Browse” button, select “jpc-client.pfx” that we sent you, then click the “Next” button
| If the file does not appear, change the file type to “Personal Information Exchange.” |
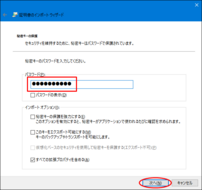
14. Enter the password received when the client certificate was issued, and click the “Next” button
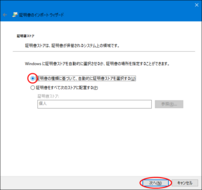
15. Select “Automatically select the certificate store based on the type of certificate” and click the “Next” button
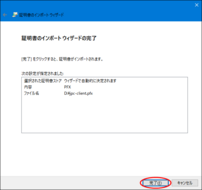
16. Click the “Finish” button
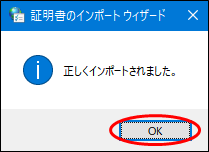
17. Click the “OK” button
The client certificate installation is now complete. You can close the “Certificates” and “Internet Properties” windows.
For macOS

1. After opening Keychain Access, select “Login” from the left side of the screen, and drag and add “JustplayerCA2.crt” and “jpc-client.pfx” that we sent you
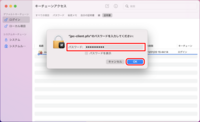
2. When adding “jpc-client.pfx,” a screen to enter the certificate password will appear. Enter the password received when the client certificate was issued and click “OK”
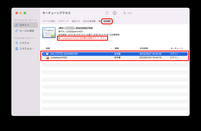
3. In the Keychain Access category, open “Certificates,” and the certificate you added will appear. Double-click it The certificate is not yet trusted by the device, so set it to be trusted.
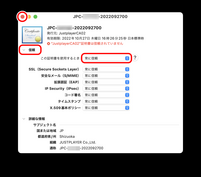
4. Click the triangle to the left of “Trust” in the window that appears, change “When using this certificate” to “Always Trust,” and click the window close button
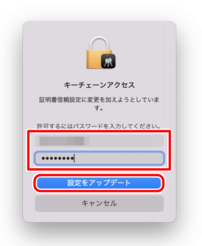
5. You will be asked for a password to change the certificate trust settings. Enter your device’s username and password, then click “Update Settings” Trust both certificates that were added.

6. The client certificate is now trusted by the device, and the installation is complete
About Updating the Client Certificate
When your client certificate is nearing expiration, you will need to update it. After installing the replacement client certificate using the steps above, remove the old certificate that was replaced.
When updating the client certificate, please update the CA certificate as well. For information on how to update the CA certificate, please refer to the following page.

 Japan
Japan Korea
Korea China
China Taiwan
 Vietnam
 Thailand
 Indonesia
 Portugal
 Spain
Spain France
 Germany
 Egypt
Egypt Russia
